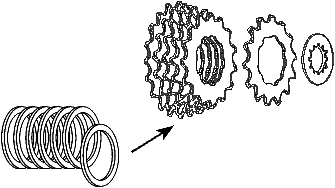
Shimano-Campag Cassette Conversion Kits,
Custom Cassette Spacers,
Packing Spacers
* These kits and spacers are currently out of production*

Shimano-Campag cassette conversion kits
These kits of spacers convert off-the-shelf cassettes to work with different gears. For example, you may have a Campag 8sp hub but want to use Shimano 9sp gears – in this case you should respace a Campag cassette with a Pulse Cassette Spacer Kit. Use the table below to tell me what gears and sprockets you use. If you’re new to this sort of thing, you’ll find Step-by-step instructions at the bottom of the page.
Click here for more information about cassettes, including how many sprockets you can fit on different hubs with different gears.
Packing spacers
A Cassette Conversion Kit includes 2 thin packing spacers which may be used to take up small amounts of slack. These may or may not be necessary and are not guaranteeded to be adequate in all situations. One of your old spacers can be used if the gap is very large, or you could purchase a Packing Spacer Kit instead…
A Pulse Packing Spacer Kit contains a selection of spacers, allowing gaps between 0.5 and 8.0mm to be filled. Combine them as appropriate to take up slack at the back of a cassette.
Custom spacers
I can machine individual custom spacers for you. Just tell me what thickness you need.
Step-by-step cassette conversion instructions
First of all – if you have an old-fashioned screwed hub that takes a screw-on freewheel, then you can’t change its spacing and must use gears that match your freewheel. And no, I’m afraid there’s no such thing as a screw-on cassette adaptor for your hub!
If you have a splined freehub, then you can use it with any gears you like – for example, you may have a Campag 8sp hub and use Shimano 9sp gears…
- Buy a cassette which fits your hub. It doesn’t matter whether it’s a 7,8,9 or 10 speed cassette, but make sure it consists of individual sprockets and spacers (not an expensive cassette with some of the sprockets rivetted onto an alloy carrier). You can even buy several cassettes and mix the sprockets in order to achieve your ideal set of gears.
- Dismantle the cassette to separate the sprockets
-
- Some cassettes are clipped together – remove the clips.
-
- Some cassettes are bolted together – unscrew the bolts.
-
- Some cassettes are rivetted together – file the heads off the rivets and punch them out.
Keep the lockring, but you can discard the spacers, clips, bolts and rivets as they will not be used again. Note that the smallest sprocket has a built-in spacer – it doesn’t matter that this can’t be changed.
-
- Order a Cassette Conversion Kit (above). Select the sprockets and gears that correspond to your system. (If you want me to check your sprocket thickness, select the last ‘sprocket’ option and send me one from the middle of your cassette.)
- Replace the sprockets and your new spacers onto your hub, one at a time.
- Add the lockring and do it up tight (if you have a torque-wrench, set it to 40 Nm).
- If the sprockets are loose, add some Packing Spacers behind the largest sprocket. If the lockring isn’t long enough, remove a sprocket and use Packing Spacers to take up the slack.
-
- A couple of thin Packing Spacers are included with every Cassette Conversion Kit.
-
- One of your old spacers can be used if the gap is very large.
-
- Or you could purchase a Packing Spacer Kit (see above).
-
